

It took a few goes (and some physical effort) to thoroughly bleed Agnetha’s hydraulic brake lines, but we finally got there and all of sudden she stops as well as drives. She’s very close to getting back on the road now: Exhaust, a bit of welding and some fettling with the steering rack – will she be registered in time for her 49th birthday in May?
Month: November 2024
Hydragas and The Impossible Repair
Having achieved some form of brake pedal it was at last time to tackle the Bogeyman of Agnetha’s recommissioning: The suspension.
what is hydragas?
Being an Austin Allegro, Agnetha’s suspension is anything but conventional. The Allegro is one of a handful of vehicles developed to use the Hydragas suspension system developed by Alex Moulton of folding bike fame. I won’t go into detail about how it works because others that know a lot more have already done that. But here’s my over-simplified airline magazine explanation:
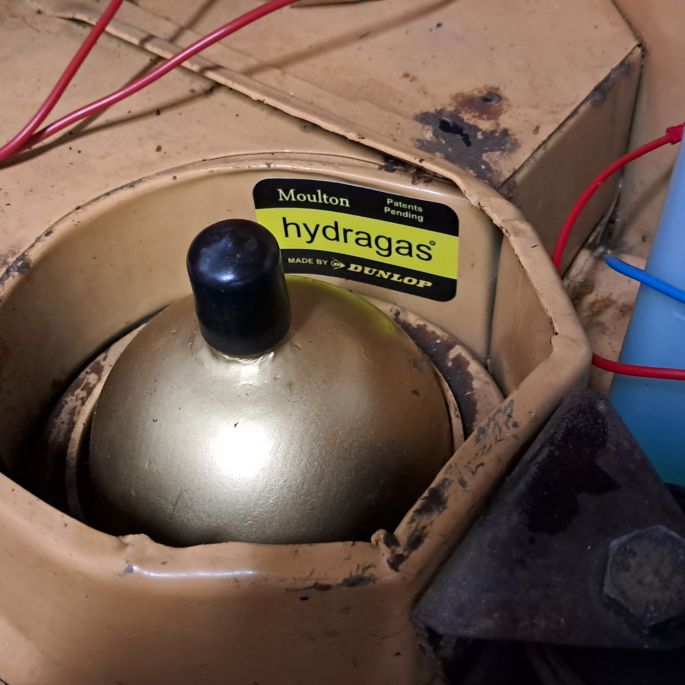
For each wheel on the car you’ve got a displacer pushing down on it. A displacer is basically a Star Wars prop that contains a fluid chamber and a sphere. The sphere contains a high pressure inert gas and is seperated from the fluid chamber by a rubber diaphragm. The displacer works like a piston that pumps a water-based fluid in and out of the fluid chamber when the wheel moves up and down. Displacers work in pairs: One pair for the left-hand side of the car, the other pair for the right-hand side. In each pair the fluid chambers of the displacers are connected by a hydraulic line running the length of the car. This means when the front wheel moves up, fluid is moved out of the front displacer and into the rear displacer, pushing the rear wheel down and resulting in a self-levelling effect.
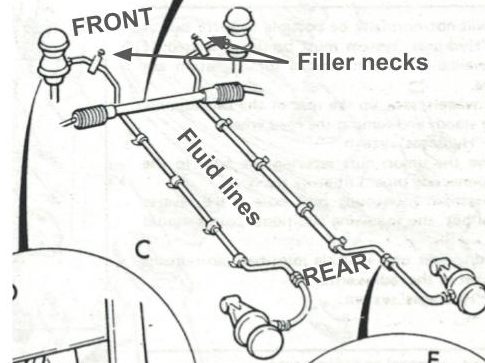
The fluid is pumped up to high pressure through Schrader valves in the filler necks, and that sets the car’s ride height. The spheres and the upper diaphragm are there to absorb shock loads. Unlike Citroën’s Hydropneumatic system, Hydragas is passive in that it has no pump to maintain pressure of the fluid or gas components, and it is completely isolated, having nothing to do with brakes are any other ancillaries. So mechanically it’s about as simple as it can possibly be. And that’s Hydragas in a nutshell. It’s a highly effective, cheap and quite simple solution let down by only two minor problems: 1) It’s technologically extinct, and 2) it has a 100% failure rate. Oopsie. Let’s have a look at these in more detail.
technologically extinct
As mentioned, only a handful of cars used Hydragas and all of them were from the strange world of British Leyland in its various historical guises, specifically: Allegro, Maxi (later models), Princess, Ambassador, Metro and MG F. The most recently manufactured of these cars, the MG F, went out of production in 2002 – over 22 years ago at the time of writing. This means NOS parts, particularly the displacers, are vanishingly rare and, even if you found one, will likely need some work to recommission them as we’ll see later. There are one or two companies that sell reconditioned sets of displacers, and one is particularly reknowned, but globally this is pretty much the only support you’re going to get unless you’re lucky enough to know some wise wizard that still practices the dark arts, hasn’t scrapped their “dalek“, and never really planned on retiring anyway. Outside the UK you’re going to be hard-pressed to find someone that ticks all of those particular boxes!
100% failure rate
This “statistic” is bandied around a lot and although it’s not really a statistic I think there’s a lot of truth in it. Hydragas relies on components being under constant high pressure and any system under pressure will inevitably leak. As long as the pressures of both the inert gas in the spheres and the suspension fluid are optimum, there’s nothing much to worry about. But the gas continually leaks from the spheres, and this is completely unavoidable. So the displacers were designed to leak at a low enough rate that they would be serviceable for at least 15 years (the intended life expectancy of the Allegro – compare that with any modern car!). Once below a critical pressure, however, Hydragas enters the infamous death spiral.

As death spirals go, Hydragas has a particularly interesting one, and once started it cannot be stopped without major intervention. With the shock-absorbing effectiveness of the spheres reduced, the shocks begin to affect the hydraulic unions causing a slight amount of suspension fluid leakage. This reduces the fluid pressure, reducing the ride height, and subsequently increasing the ride hardness, further reducing the shock-absorbing effectiveness of the spheres and exacerbates the fluid leakage. And so it goes on until the suspension has no softness at all and the car is sitting on the bump-stops. As we get closer to the middle of the spiral, the risk of suspension failure increases dramatically. Failure can be in the form of fluid/gas diaphragm rupture in one or more displacers, or even as structural damage to the suspension arms and strut towers.
It might be tempting to refill the fluid lines on seeing the car’s ride height reduce. This will return the car to its intended ride height but will not make the ride softer and only tightens the spiral. The increased pressure in the fluid lines simply worsens the leakage and puts additional strain on the fluid/gas diaphragm.
So what do we need to do? Back in “them days” you would simply order a brand new set of displacers with optimum gas pressure and have them fitted as if you were replacing worn-out coils or broken springs. As we’ve already discussed, this is sadly no longer an option.
sphere re-gassing
The sensible option at this stage is to order a set of reconditioned displacers from The Kennedys. These are used displacers that have had Schrader valves installed in the spheres so that they can be re-gassed whenever needed. I eventually got around to ordering a set, but not before spending a huge amount of time getting my hands dirty trying to re-gas the displacers myself! I don’t think I’d try this on a car that was otherwise in good working order, but with Agnetha there was nothing much to lose.
DISCLAIMER: These are not instructions! It’s an account of what I did, for better or worse. You may cause irreparable damage to the car or its components – ask me how I know.
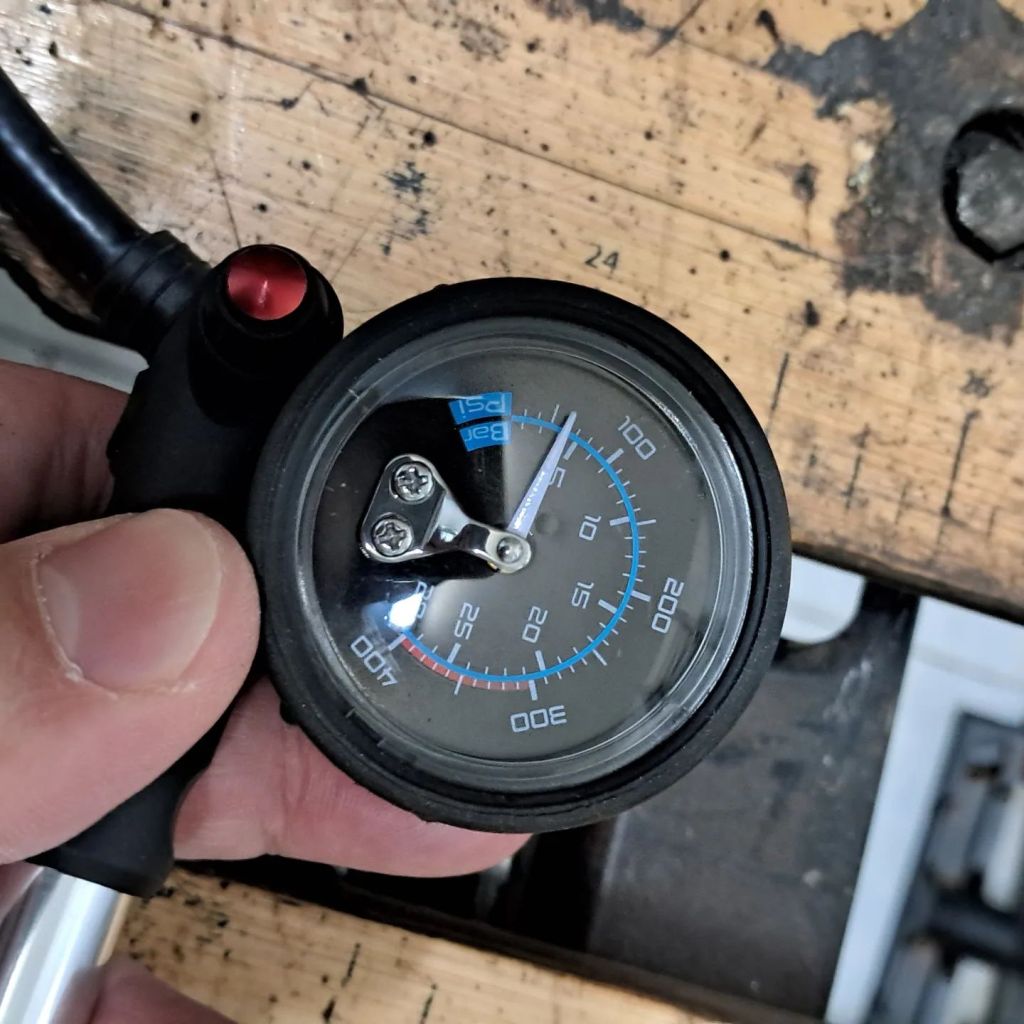
To re-gas the displacers I followed the method documented here, more-or-less. It basically involves drilling a hole in the top of the sphere (very carefully!) and attaching a heavy-duty Schrader valve (the type used on truck and bus wheels). Using the valve you can re-pressurise the sphere with nitrogen to the prescribed 15 bar. Compressed air is basically nitrogen, right? There is, naturally, a catch. If a displacer has spent any time on the death spiral – or if the suspension fluid was “accidentally” topped up with brake fluid or LHM (the Kiss of Death) – there is a chance it will have a ruptured fluid/gas diaphragm. Common knowledge amongst Hydragasologists says that a ruptured fluid/gas diaphragm is an Impossible Repair and the displacer cannot be re-gassed or re-used in any way; it’s scrap. As you’ll see I’ve found no evidence to contradict this.

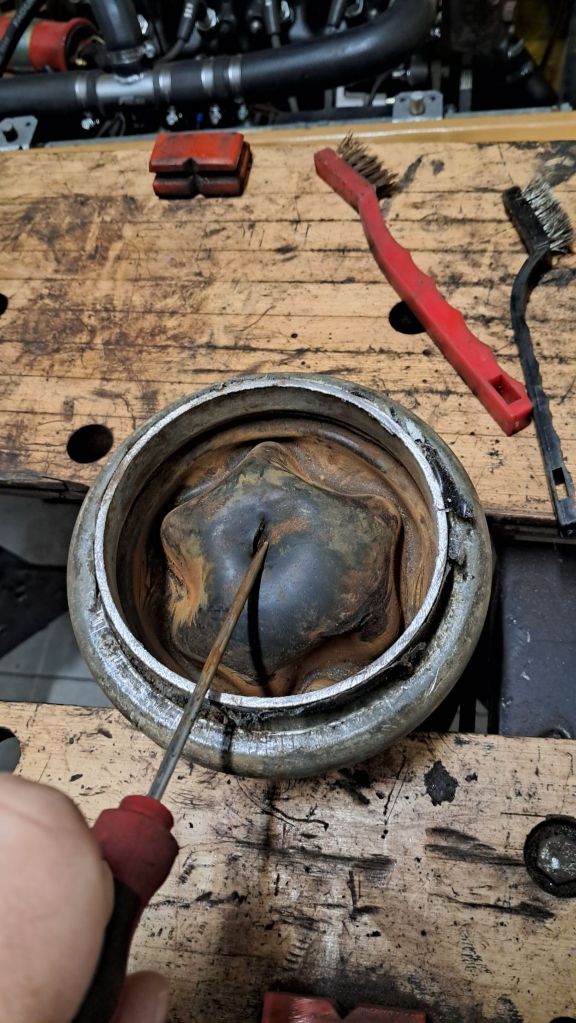
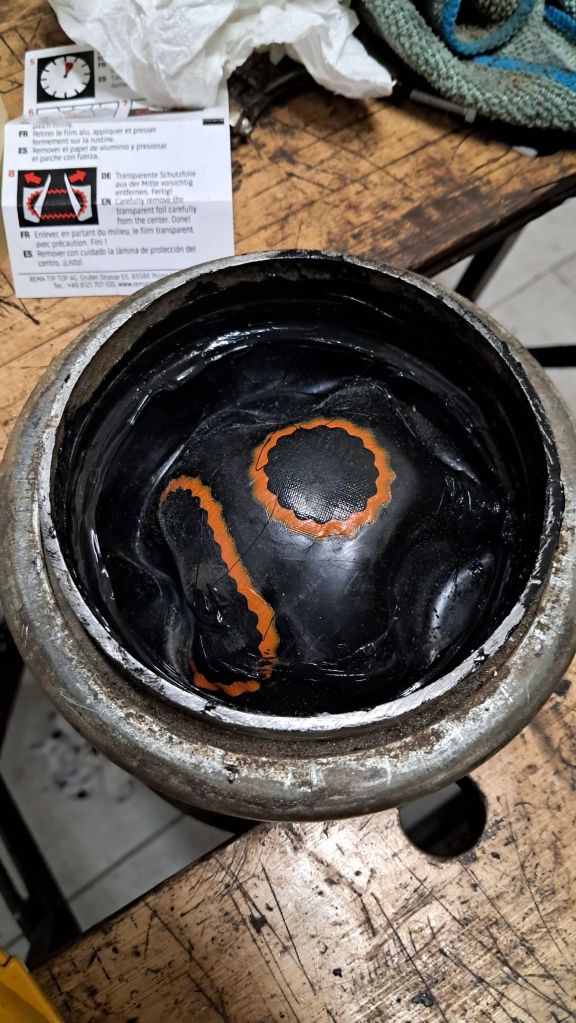
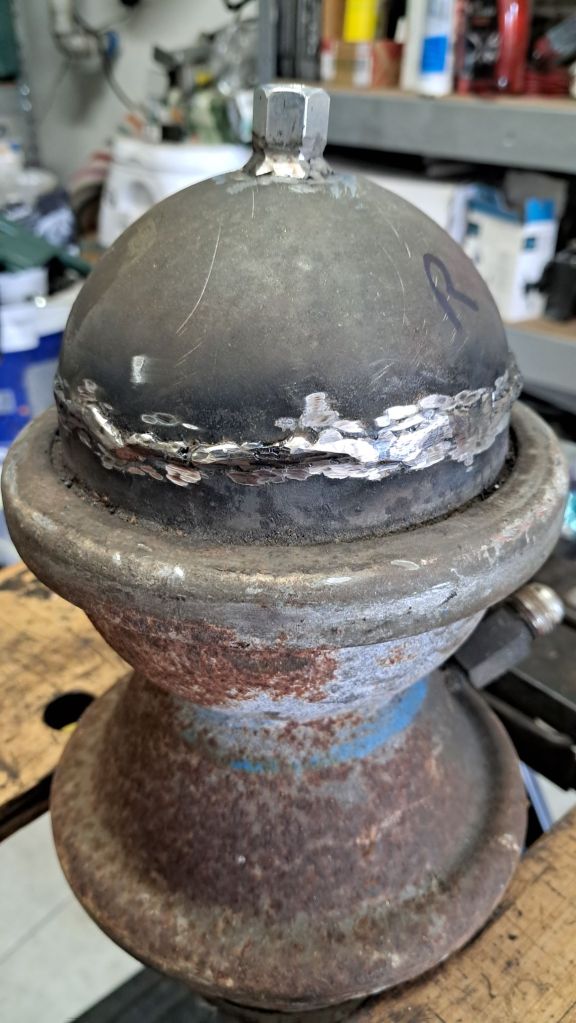
On drilling the hole for the Schrader, sure enough one of the front displacer spheres was full of rusty water. Gas/fluid diaphragm failure! The Impossible Repair! Doom! Failure! But what have I got to lose by trying something impossible? I decided to saw the sphere carefully in half manually using a hacksaw so as not to blast whatever was inside to smithereens. After cleaning the inside I noticed the gas/fluid diaphragm indeed had two small holes and was perished around the circumference. It does seem impossible to replace the entire diaphragm but what about patching it?
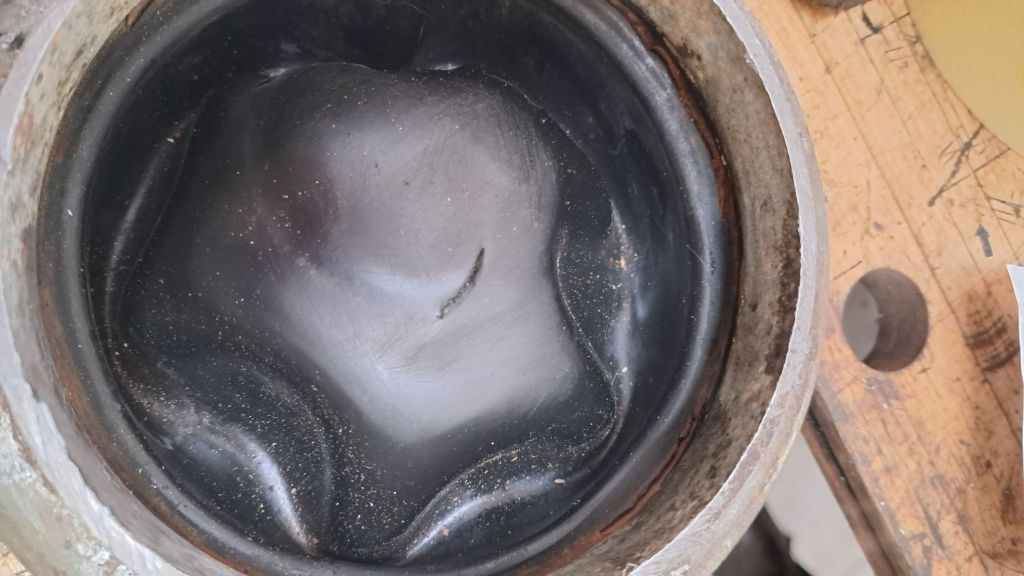

At this stage anything was worth a try. Using a tractor inner tube repair kit I patched the two holes and sealed the circumference with a generous amount of Soudal Fix All, a very strong elastic glue.
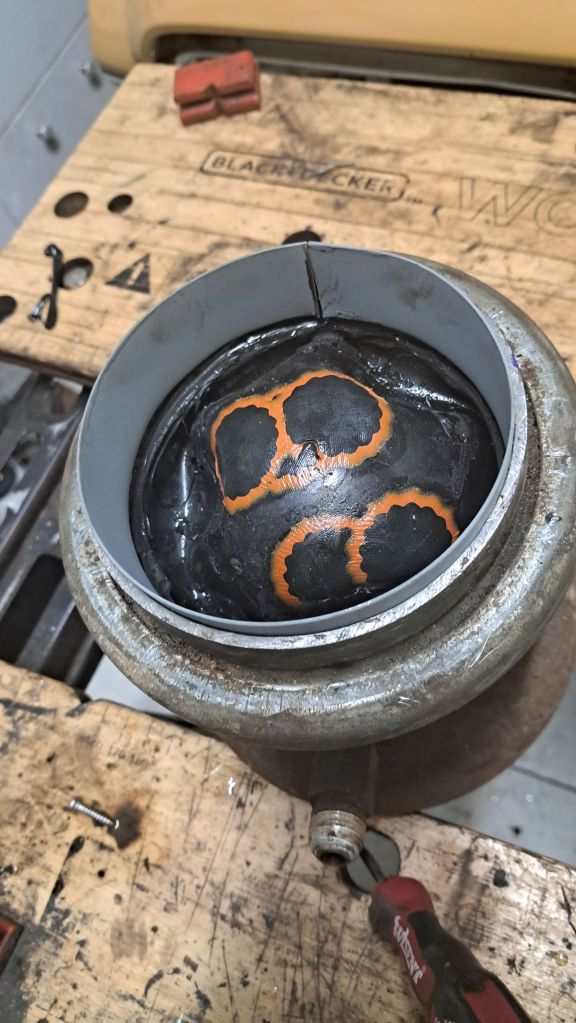
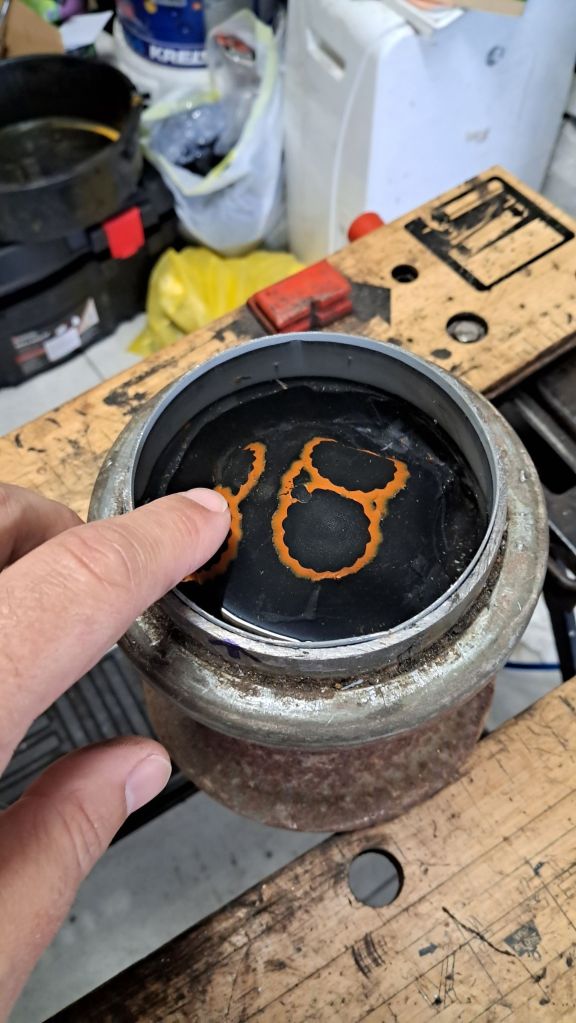
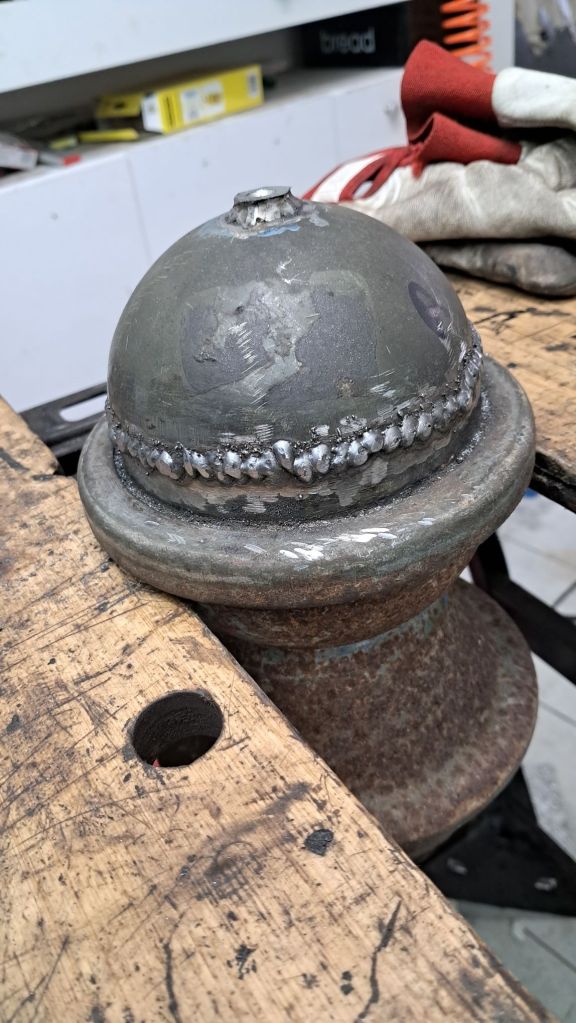
Now to weld the sphere back together. Should be fun welding so close to all that glue and rubber! First I made a collar from a sheet of car body steel to fit inside the sphere that would sit about 1 – 2mm proud of the cut. This was to prevent sparks from the welder entering the sphere and burning the diaphragm. It might have also helped keep the Fix All in place when the water circuit was pressurised – unfortunately I didn’t get that far! To keep the heat under control I then filled it with water.
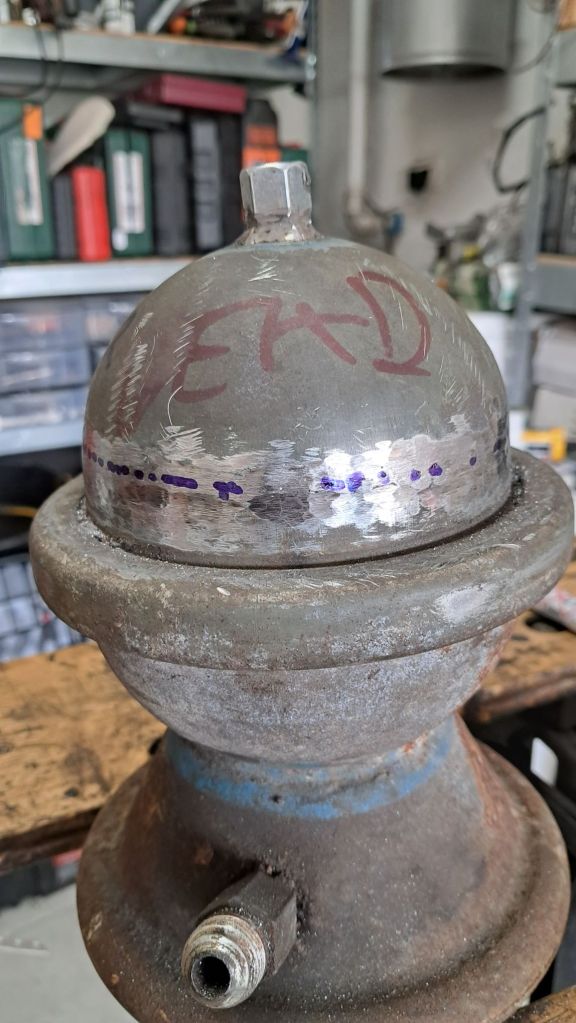
With the collar in place I began welding the top half of the sphere to the rest of the unit, very slowly and carefully. The welds were ugly and porous due to steam rushing out alarmingly from under the collar, but the water did its job and kept the rubber and glue from burning. After grinding the welds back it was not as bad a job as I thought, the welds showing good penetration all round but the seam had numerous holes where the steam had escaped. I was able to patch the holes by welding over the entire seam using a slightly lower feed-rate, again slowly and carefully. These welds were only ground back a little bit to reduce the height so that the unit could fit inside the suspension tower – given what’s a stake I prefer integrity over aesthetics!

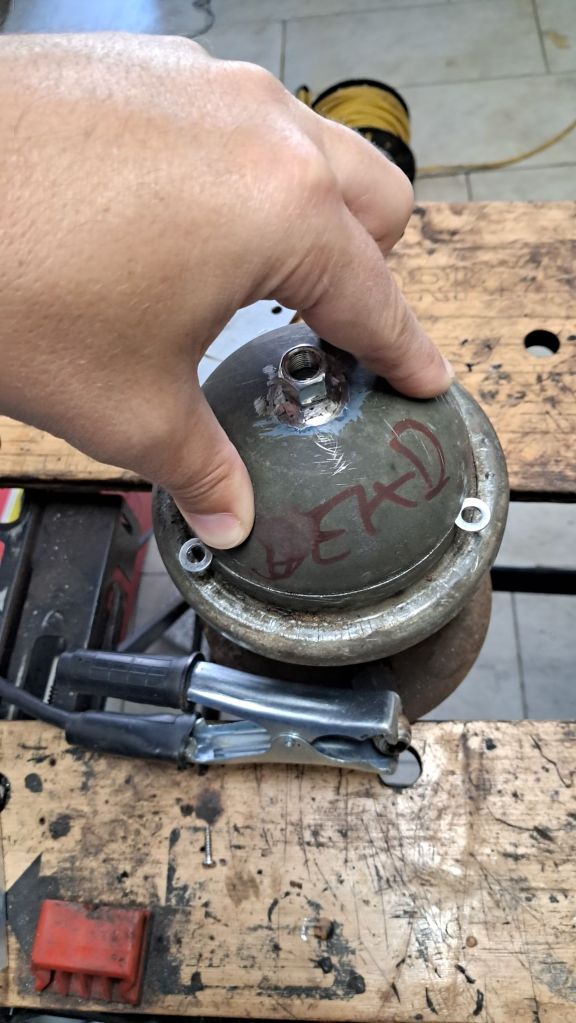

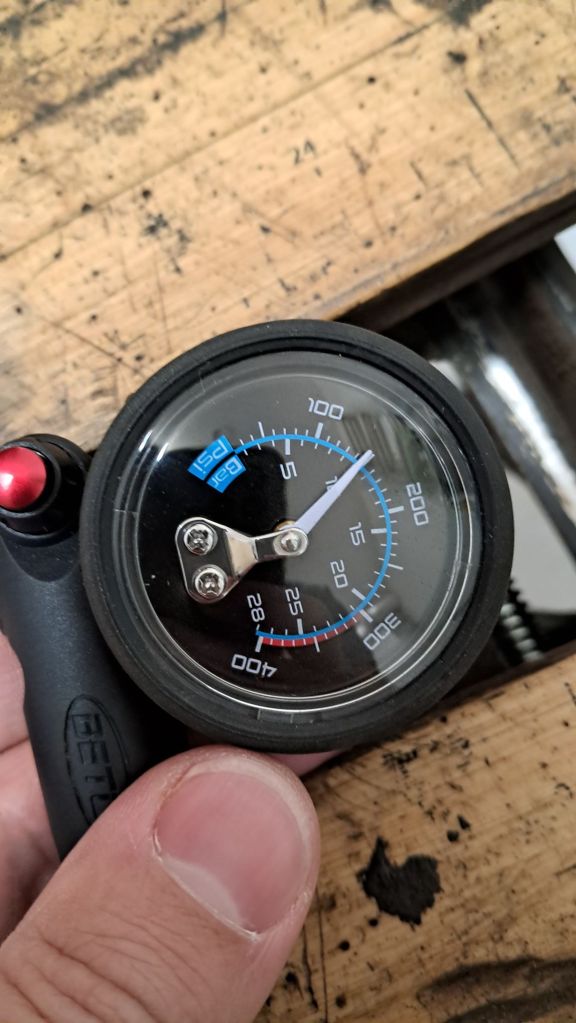
After that we were back on the map: Install the Schrader, make sure it takes a few bar of compressed air, then a good clean up and paint. Unfortunately, after pumping up to 10 bar and leaving overnight to test for leaks, I measured only 3 bar the following morning. A leaking Schrader could be easily fixed, but if the leak is through the diaphragm it would be time to call it quits. To test this I pumped it back up to 10 bar and put the thumb of a rubber glove over the fluid port of the displacer. If the air leaks through the diaphragm then the thumb will inflate. Sure enough, the next day we were back to a couple of bar and the thumb was certainly inflated – time to throw in the towel.
This is when I placed an order with The Kennedys and a few days later a set of reconditioned displacers arrived, fully tested with a 1 year guarantee; the installation of which was only complicated by my poor plumbing skills. I recorded it all in this video:
I’m pleased to report that Agnetha is now as bouncy as she can be. Two years into the restoration, mechanically and structurally she is almost ready for the road again for the first time in 35 years. She still needs a new exhaust and there is a list of minor snags to fix first, but nothing to cause any major worries. In fact, it’s nearly time to get some workshop quotes to get her over the line and tested at last.


Last but not least, I ordered some reproduction engine bay stickers from Miniphernalia and put them on the strut towers. It’s got to look right!
